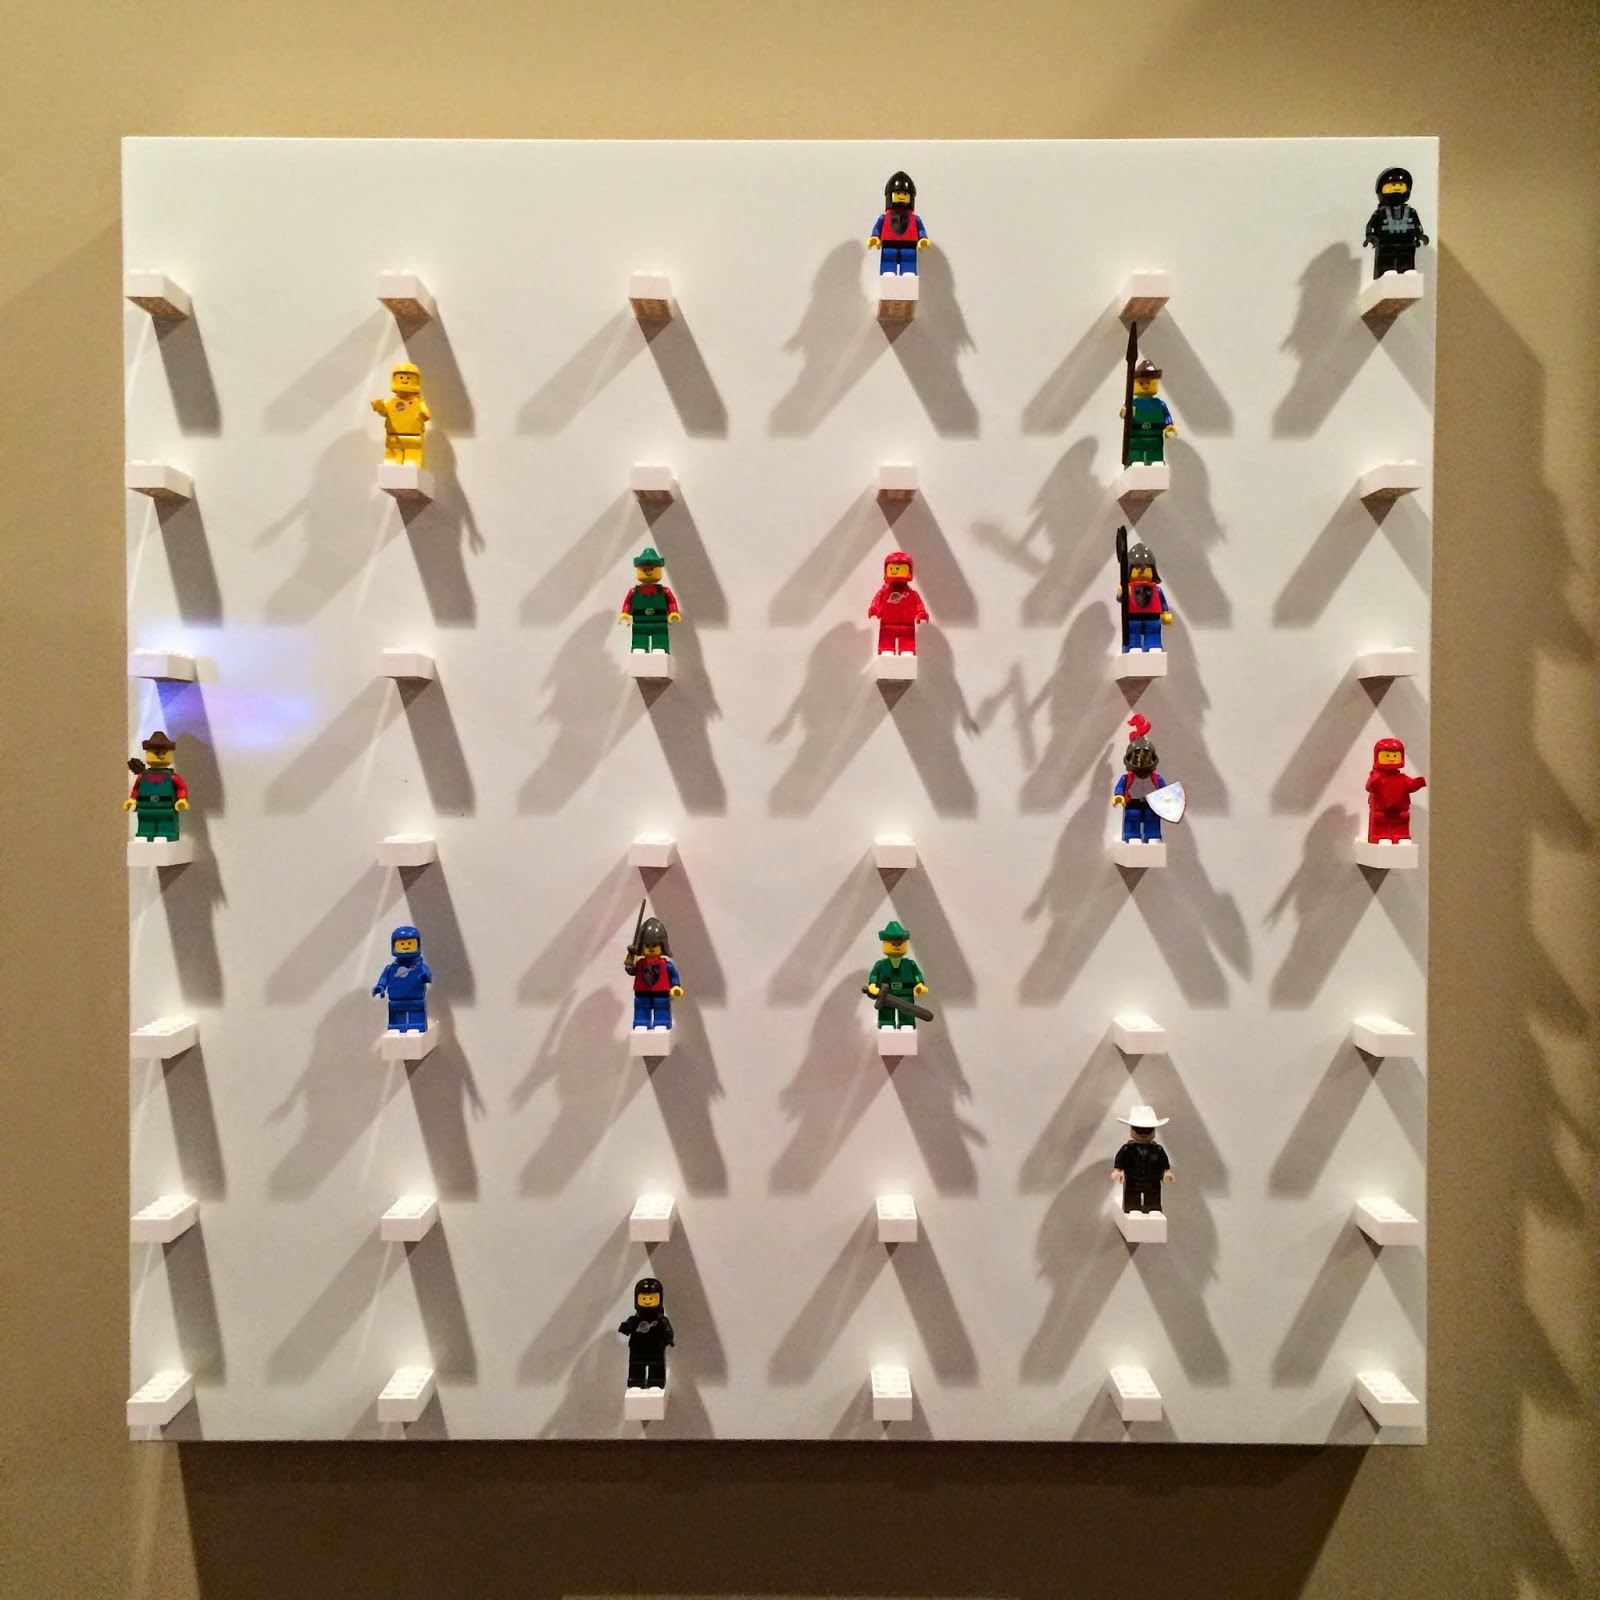
Hacked IKEA Lack Side Table into Lego Minifigure Display Wall Art
This is a commission for a friend, for her son's Christmas present.
I started with IKEA's Lack Side Table in High Gloss White ($12.99 plus tax)
I bought 46 White Lego Bricks, 2 x 4 (part 3001) from Bricklink.com for $.195 each ($8.78 plus shipping)
For the spacing, I came in 1/2" from the side, and used 4" spacing from the left side of each brick. The bottom of the bricks on the top row are 3" below the top of the Lack, and I used the same vertical spacing. This gives me 42 "shelves" to display Lego Minifigs. (I bought extra bricks in case of a mixup with the epoxy--which I did have!).
I used a level and painters tape to make sure my lines were straight, and I made marks on the painters tape to indicate where the bricks would line up
 |
I started with IKEA's Lack Side Table in High Gloss White ($12.99 plus tax)
I bought 46 White Lego Bricks, 2 x 4 (part 3001) from Bricklink.com for $.195 each ($8.78 plus shipping)
For the spacing, I came in 1/2" from the side, and used 4" spacing from the left side of each brick. The bottom of the bricks on the top row are 3" below the top of the Lack, and I used the same vertical spacing. This gives me 42 "shelves" to display Lego Minifigs. (I bought extra bricks in case of a mixup with the epoxy--which I did have!).
I used a level and painters tape to make sure my lines were straight, and I made marks on the painters tape to indicate where the bricks would line up
I used JB Weld 2 Part Epoxy to affix the bricks to the table top. I placed the bricks quickly, and pulled up the tape as I went, so I didn't have any blue painters tape permanently affixed to the table top.
I haven't used a TON of pressure on the bricks, but there's not much wiggle in the bricks. The true test will be when it gets delivered into the hands of an 8 year old boy.
To hang the Lack Table to the wall, I selected a basic large Sawtooth hanger and nailed in into the back of the Lack.
Except for the Lone Ranger, all the vintage Castle and Space figures (Blacktron in the upper right!) are from my childhood.
Let me know if you have questions or need clarification on how I did anything!
UPDATE: 4 bricks have already come off the board, despite the 2 part epoxy. This is not a "toy" and needs to be handled fairly gingerly. For a future version, the best bet may be to use a shorter brick, a 2x2 Brick with Pin and No Axle Hole (4730), and drill a lot of tiny holes into the face of the IKEA Lack, use 2-part Epoxy, and gain some added leverage. However, I don't know how I would like the change in aesthetics using shorter bricks. The only 2x4 bricks with Pins are axles and that wouldn't look right at all!


Comments